里面有一个库可以生成可交互的词云,非常牛逼!
参考资料
stylecloud
安装 pip3 install stylecloudstylecloud具有以下特点:
为词云提供(任意大小)的图标形状(通过 Font Awesome 5.11.2 获得)
支持高级调色板(通过 palettable 实现)
为上述调色板提供直接梯度
支持读取文本文件,或预生成的 CSV 文件(包含单词和数字)
提供命令行接口
蒙版图片 影响词云颜值的问题之一就是蒙版图片的生成。
自己制作的蒙版图片要么分辨率不统一,要么需要调整对比度,比较麻烦,stylecloud是直接使用 Font Awesome 这个现成的方案。
在 stylecloud\static 的文件夹下,有一个 fontawesome.min 的 css 文件包含了大量的图标,打开查看里面的内容,发现其中包含很多图标的代码。
这种 css 层叠样式表,咱也看不懂、也不知道咋用呀,多亏有中文网站分门别类罗列了图标的样子和名字。
里面有详细的图标介绍和分类。
基本用法
您可以使用样式前缀和图标名称将“ Font Awesome ”图标放置在几乎任何地方。 我们努力达到这一目标,以使图标具有这些特征并自然地与文本显示在一起。
Font Awesome旨在与内联元素一起使用,我们建议使用一致的HTML元素以在项目中引用它们。 我们喜欢<i>标签的简洁性,因为最近大多数人都在使用<em> </em>来强调/斜体化语义文本。 如果那不是您的理想之选,那么在语义上使用<span>更为正确。
您需要知道两点信息才能引用一个图标:
以 fa- 为前缀的名称;
要使用的相应前缀的样式。
1 2 3 4 <div > </div > <i class ="fas fa-camera" > </i > <i class ="fas fa-camera" > </i > <span class ="fas fa-camera" > </span >
比如要使用苹果商标的蒙版图片,样式前缀 fab,以 fa-为前缀的名称 fa-apple,设置icon_name参数,icon_name='fab fa-apple'即可。
配色 配色是影响词云颜值的又一大问题。stylecloud同样找到了比较好的方案,配色方案使用高级调色板 palettable 来实现。
我们可以通过修改参数 palette='配色方案' 来达到更改自己的词云配色。
绘制词云
主要参数如下:
1
2
3
4
5
6
7
8
9
10
11
12
13
14
text :输入文本,最好在直接调用函数时使用。file_path :输入文本/CSV 的文件路径icon_name :stylecloud 形状的图标名称(如 fas fa-grin-beam),[default : fas fa-flag]palette :控制调色方案,stylecloud的调色方案调用了palettable,这是一个非常实用的模块,其内部收集了数量惊人的大量的经典调色方案,默认为 cartocolors.qualitative.Bold_5 output_name :stylecloud 的输出文本名。[default : stylecloud.png]gradient :梯度方向,(其默认值是 None ,如果它的值不是 None ,则 stylecloud 使用了方向性梯度)[default : None ]size :控制输出图像文件的分辨率(因为stylecloud默认输出方形图片,所以size传入的单个整数代表长和宽),默认为512 font_path :stylecloud 所用字体 .ttf 文件的路径。[default : uses included Staatliches font]random_state :控制单词和颜色的随机状态background_color :字符串,控制词云图底色,可传入颜色名称或16 进制色彩,默认为 whitemax_font_size :stylecloud 中的最大字号 [default : 200]max_words :stylecloud 可包含的最大单词数 [default : 2000]stopwords :bool型,控制是否开启去停用词功能,默认为True ,调用自带的英文停用词表custom_stopwords :传入自定义的停用词List ,配合stopwords共同使用
代码如下
1 2 3 4 5 6 7 8 9 10 11 12 13 14 15 16 17 18 19 20 21 22 23 24 25 26 27 28 29 30 31 32 33 34 35 36 37 38 39 40 41 42 43 44 45 46 47 48 """ @Author :叶庭云 @CSDN :https://yetingyun.blog.csdn.net/ """ from stylecloud import gen_stylecloudimport jiebaimport reimport randomwith open('datas.txt' , encoding='utf-8' ) as f: data = f.read() new_data = re.findall('[\u4e00-\u9fa5]+' , data, re.S) new_data = "/" .join(new_data) seg_list_exact = jieba.cut(new_data, cut_all=True ) result_list = [] with open('stop_words.txt' , encoding='utf-8' ) as f: con = f.readlines() stop_words = set() for i in con: i = i.replace("\n" , "" ) stop_words.add(i) for word in seg_list_exact: if word not in stop_words and len(word) > 1 : result_list.append(word) print(result_list) gen_stylecloud( text=' ' .join(result_list), size=600 , font_path=r'C:\Windows\Fonts\msyh.ttc' , output_name='词云.png' , icon_name='fas fa-grin-beam' , palette=cartocolors.qualitative.Bold_5 )
运行效果
wordcloud
参考资料
安装 If you are using pip:
pip install wordcloudIf you are using conda, you can install from the conda-forge channel:
conda install -c conda-forge wordcloudwordcloud库把词云当作一个WordCloud对象。
wordcloud.WordCloud() 代表一个文本对应的词云可以根据文本中词语出现的频率等参数绘制词云
绘制词云的形状,尺寸和颜色都可以设定
配置对象参数。
参数
描述
例子
width
指定词云对象生成图片的宽度,默认400像素
w=wordcloud.WordCloud(width=600)
height
指定词云对象生成图片的高度,默认200像素
w=wordcloud.WordCloud(height=400)
min_font_size
指定词云中字体的最小字号,默认4号
w=wordcloud.WordCloud(min_font_size=10)
max_font_size
指定词云中字体的最大字号,根据高度自动调节
w=wordcloud.WordCloud(max_font_size=20)
font_step
指定词云中字体字号的步进间隔,默认为1
w=wordcloud.WordCloud(font_step=2)
font_path
指定文件字体的路径,默认None
w=wordcloud.WordCloud(font_path=”msyh.ttc”)
max_words
指定词云显示的最大单词数量,默认200
w=wordcloud.WordCloud(font_step=2)
stop_words
指定词云的排除词列表,即不显示的单词列表
w=wordcloud.WordCloud(stop_words={“Python”})
mask
指定词云形状,默认为长方形,需要应用imread()函数
from scipy.misc import imread
background_color
指定词云图片的背景颜色,默认为黑色
w=wordcloud.WordCloud(background_color=”white”)
代码实现:
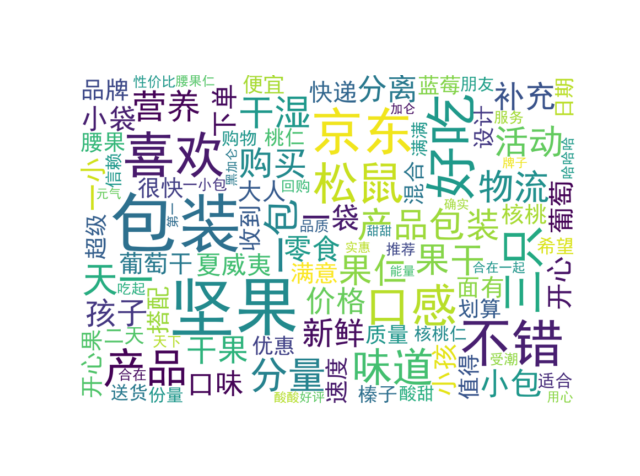
1 2 3 4 5 6 7 8 9 10 11 12 13 14 15 16 17 18 19 20 21 22 23 24 25 26 27 28 29 30 31 32 33 34 35 36 37 38 39 40 41 42 43 44 45 46 47 48 49 50 51 52 53 54 55 56 57 58 59 """ @Author :叶庭云 @CSDN :https://yetingyun.blog.csdn.net/ """ import jiebaimport collectionsimport refrom wordcloud import WordCloudimport matplotlib.pyplot as pltwith open('data.txt' ) as f: data = f.read() new_data = re.findall('[\u4e00-\u9fa5]+' , data, re.S) new_data = " " .join(new_data) seg_list_exact = jieba.cut(new_data, cut_all=True ) result_list = [] with open('stop_words.txt' , encoding='utf-8' ) as f: con = f.readlines() stop_words = set() for i in con: i = i.replace("\n" , "" ) stop_words.add(i) for word in seg_list_exact: if word not in stop_words and len(word) > 1 : result_list.append(word) print(result_list) word_counts = collections.Counter(result_list) word_counts_top100 = word_counts.most_common(100 ) print(word_counts_top100) my_cloud = WordCloud( background_color='white' , width=900 , height=600 , max_words=100 , font_path='simhei.ttf' , max_font_size=99 , min_font_size=16 , random_state=50 ).generate_from_frequencies(word_counts) plt.imshow(my_cloud, interpolation='bilinear' ) plt.axis('off' ) plt.show()
词云图:
pyecharts库的WordCloud绘制词云
pyecharts是基于echarts的python库,能够绘制多种交互式图表,和其他可视化库不一样,pyecharts支持链式调用。
也就是说添加图表元素、修改图表配置,只需要简单的调用组件即可。
1 2 3 4 5 class WordCloud ( init_opts: opts.InitOpts = opts.InitOpts() )
1 2 3 4 5 6 7 8 9 10 11 12 13 14 15 16 17 18 19 20 21 22 23 24 25 26 27 28 29 30 31 32 33 34 35 36 37 38 39 40 41 42 43 44 45 46 47 48 49 50 51 52 53 54 55 56 57 58 59 60 61 def add ( series_name: str, data_pair: Sequence, shape: str = "circle" , mask_image: types.Optional[str] = None, word_gap: Numeric = 20 , word_size_range=None, rotate_step: Numeric = 45 , pos_left: types.Optional[str] = None, pos_top: types.Optional[str] = None, pos_right: types.Optional[str] = None, pos_bottom: types.Optional[str] = None, width: types.Optional[str] = None, height: types.Optional[str] = None, is_draw_out_of_bound: bool = False, tooltip_opts: Union[opts.TooltipOpts, dict, None] = None, textstyle_opts: types.TextStyle = None, emphasis_shadow_blur: types.Optional[types.Numeric] = None, emphasis_shadow_color: types.Optional[str] = None, )
代码实现
1 2 3 4 5 6 7 8 9 10 11 12 13 14 15 16 17 18 19 20 21 22 23 24 25 26 27 28 29 30 31 32 33 34 35 36 37 38 39 40 41 42 43 44 45 46 47 48 49 50 51 52 53 54 55 56 57 """ @Author :叶庭云 @CSDN :https://yetingyun.blog.csdn.net/ """ import jiebaimport collectionsimport refrom pyecharts.charts import WordCloudfrom pyecharts.globals import SymbolTypefrom pyecharts import options as optsfrom pyecharts.globals import ThemeType, CurrentConfigCurrentConfig.ONLINE_HOST = 'D:/python/pyecharts-assets-master/assets/' with open('data.txt' ) as f: data = f.read() new_data = re.findall('[\u4e00-\u9fa5]+' , data, re.S) new_data = " " .join(new_data) seg_list_exact = jieba.cut(new_data, cut_all=True ) result_list = [] with open('stop_words.txt' , encoding='utf-8' ) as f: con = f.readlines() stop_words = set() for i in con: i = i.replace("\n" , "" ) stop_words.add(i) for word in seg_list_exact: if word not in stop_words and len(word) > 1 : result_list.append(word) print(result_list) word_counts = collections.Counter(result_list) word_counts_top100 = word_counts.most_common(100 ) print(word_counts_top100) word1 = WordCloud(init_opts=opts.InitOpts(width='1350px' , height='750px' , theme=ThemeType.MACARONS)) word1.add('词频' , data_pair=word_counts_top100, word_size_range=[15 , 108 ], textstyle_opts=opts.TextStyleOpts(font_family='cursive' ), shape=SymbolType.DIAMOND) word1.set_global_opts(title_opts=opts.TitleOpts('商品评论词云图' ), toolbox_opts=opts.ToolboxOpts(is_show=True , orient='vertical' ), tooltip_opts=opts.TooltipOpts(is_show=True , background_color='red' , border_color='yellow' )) word1.render("商品评论词云图.html" )
词云图:
用 pyecharts 绘制的词云图渲染在网页上,具有交互效果,还有很多的配置参数可以设置让词云图看起来更美观。