0%

matplotlib 动态图总结

这个厉害了,直接 show code。


参考文章


Python使用matplotlib画动态图
创造生动有趣的动画,Matplotlib库大显身手
python之matplotlib学习(三) 画动态更新图

Matplotlib是一个 Python 的 2D绘图库,也是Python中最受欢迎的绘图数据库。大多数人在踏上数据可视化之旅时,都是首选Matplotlib。这是因为它可简单地生成绘图,直方图、功率谱、条形图、错误图、散点图等。不仅如此,它还无缝连接了Pandas、Seaborn等数据库,甚至创建出更为复杂的可视化数据。


优点


其构造和MATLAB(矩阵实验室)类似,所以两者间易于切换

包含许多后端渲染

可以快速生成绘图

已存在数十年以上,因此,有大量的用户基础


缺点


Matplotlib常常不可避免地存在冗繁的API(应用程序编程接口)

有时默认样式设计不如人意

对web和交互式图表的支持较低

处理大型及复杂的数据时速度常常较慢


动态条形图


基本原理是将数据放入数组,然后每次往数组里面增加一个数,清除之前的图,重新画出图像。

1
2
3
4
5
6
7
8
9
import matplotlib.pyplot as plt
fig, ax = plt.subplots()
y1 = []
for i in range(50):
y1.append(i) # 每迭代一次,将i放入y1中画出来
ax.cla() # 清除键
ax.bar(y1, label='test', height=y1, width=0.3)
ax.legend()
plt.pause(0.1)

动态折线图


基本原理是使用一个长度为2的数组,每次替换数据并在原始图像后追加。

1
2
3
4
5
6
7
8
9
10
11
12
13
14
15
16
17
import numpy as np
import matplotlib.pyplot as plt

plt.axis([0, 100, 0, 1])
plt.ion()

xs = [0, 0]
ys = [1, 1]

for i in range(100):
y = np.random.random()
xs[0] = xs[1]
ys[0] = ys[1]
xs[1] = i
ys[1] = y
plt.plot(xs, ys)
plt.pause(0.1)

动画


Matplotlib的动画基类负责处理动画部分。其可提供构建动画功能的框架。有两个主要接口来实现此功能:

FuncAnimation:通过反复触发func.功能创建动画。

ArtistAnimation:利用已定义的Artist对象创建动画。

但是,在上述两种接口中,FuncAnimation更为方便。我们专注于FuncAnimation工具的研究。


移动的正弦波


1
2
3
4
5
6
7
8
9
10
11
12
13
14
15
16
17
18
19
20
21
22
import numpy as np
from matplotlib import pyplot as plt
from matplotlib.animation import FuncAnimation
plt.style.use('seaborn-pastel')

fig = plt.figure()
ax = plt.axes(xlim=(0, 4), ylim=(-2, 2))
line, = ax.plot([], [], lw=3)

def init():
line.set_data([], [])
return line,
def animate(i):
x = np.linspace(0, 4, 1000)
y = np.sin(2 * np.pi * (x - 0.01 * i))
line.set_data(x, y)
return line,

anim = FuncAnimation(fig, animate, init_func=init,
frames=200, interval=20, blit=True)

anim.save('sine_wave.gif', writer='imagemagick')

在第7行到第9行,简单地创建一个图形窗口,图中只有一个轴。然后,创建无内容的行对象,其本质上是在动画中可修改的对象。稍后用数据来填充行对象。

在第11行到13行,创建init函数,触发动画发生。此函数初始化数据,并限定轴范围。

最后,在第14行到第18行,定义动画函数,该函数以帧数(i)作为参数,并创建一个正弦波(或任意其他的动画),而其移动取决于i的值。此函数返回一个已修改的plot对象的元组,告知动画框架plot中哪些部分需要动画化。

在第20 行,创建实际的动画对象。Blit参数确保只重新绘制已更改的部分。


实时更新图


绘制股票数据、传感器数据等其他与时间相关的动态数据时,实时更新图就会派上用场。我们绘制一个基图,在更多的数据被输入系统后,基图就会自动更新。现在,来绘制某假定公司某月内的股价图。

1
2
3
4
5
6
7
8
9
10
11
12
13
14
15
16
17
18
19
20
21
22
23
24
25
26
27
28
#importing libraries
import matplotlib.pyplot as plt
import matplotlib.animation as animation

fig = plt.figure()
#creating a subplot
ax1 = fig.add_subplot(1,1,1)

def animate(i):
data = open('stock.txt','r').read()
lines = data.split('\n')
xs = []
ys = []

for line in lines:
x, y = line.split(',') # Delimiter is comma
xs.append(float(x))
ys.append(float(y))

ax1.clear()
ax1.plot(xs, ys)

plt.xlabel('Date')
plt.ylabel('Price')
plt.title('Live graph with matplotlib')

ani = animation.FuncAnimation(fig, animate, interval=1000)
plt.show()

其更新的时间间隔是1000毫秒或一秒。


3D图中的动画


创建3D图形十分常见,但是如果可以将这些图形视角动画化呢?其方法是,在改变相机视图后,利用生成后的所有图像来创建动画。而在PythonGraph Gallery(Python图形库)中有个专门的部分可以完成这类工作。

首先创建一个名为volcano的文件夹,放在与记事本相同的目录中。然后,将所有会用于动画化的图形储存在该文件夹中。

1
2
3
4
5
6
7
8
9
10
11
12
13
14
15
16
17
18
19
20
21
22
23
24
25
26
27
28
29
30
31
# library
from mpl_toolkits.mplot3d import Axes3D
import matplotlib.pyplot as plt
import pandas as pd
import seaborn as sns

# Get the data (csv file is hosted on the web)
url = 'https://python-graph-gallery.com/wp-content/uploads/volcano.csv'
data = pd.read_csv(url)

# Transform it to a long format
df=data.unstack().reset_index()
df.columns=["X","Y","Z"]

# And transform the old column name in something numeric
df['X']=pd.Categorical(df['X'])
df['X']=df['X'].cat.codes

# We are going to do 20 plots, for 20 different angles
for angle in range(70,210,2):

# Make the plot
fig = plt.figure()
ax = fig.gca(projection='3d')
ax.plot_trisurf(df['Y'], df['X'], df['Z'], cmap=plt.cm.viridis, linewidth=0.2)

ax.view_init(30,angle)

filename='Volcano/Volcano_step'+str(angle)+'.png'
plt.savefig(filename, dpi=96)
plt.gca()

这样就可以在Volcano文件夹中创建多个PNG文件。接着,利用ImageMagick(一个创建、编辑、合成图片的软件)将这些PNG文件转化成动画。打开终端并导向Volcano文件夹,输入以下指令:

convert -delay 10 Volcano*.pnganimated_volcano.gif


利用Celluloid模块动画化


Celluloid是python中的一个模块,其在matplotlib中可简化创建动画的进程。这个库创建一个matplotlib图并从中创建相机。然后,重新启用该图,并在创建每帧动画后,用上述相机拍快照。最后,利用所有捕捉到的帧创建动画。

安装

pip install celluloid

下面是利用Celluloid模块的例子:

极小值

创建3D图形十分常见,但是如果可以将这些图形视角动画化呢?其方法是,在改变相机视图后,利用生成后的所有图像来创建动画。而在PythonGraph Gallery(Python图形库)中有个专门的部分可以完成这类工作。

首先创建一个名为volcano的文件夹,放在与记事本相同的目录中。然后,将所有会用于动画化的图形储存在该文件夹中。

1
2
3
4
5
6
7
8
9
10
from matplotlib import pyplot as plt
from celluloid import Camera

fig = plt.figure()
camera = Camera(fig)
for i in range(10):
plt.plot([i] * 10)
camera.snap()
animation = camera.animate()
animation.save('celluloid_minimal.gif', writer = 'imagemagick')

子图

1
2
3
4
5
6
7
8
9
10
11
12
13
14
import numpy as np
from matplotlib import pyplot as plt
from celluloid import Camera

fig, axes = plt.subplots(2)
camera = Camera(fig)
t = np.linspace(0, 2 * np.pi, 128, endpoint=False)
for i in t:
axes[0].plot(t, np.sin(t + i), color='blue')
axes[1].plot(t, np.sin(t - i), color='blue')
camera.snap()

animation = camera.animate()
animation.save('celluloid_subplots.gif', writer = 'imagemagick')

图例

1
2
3
4
5
6
7
8
9
10
11
12
import matplotlib
from matplotlib import pyplot as plt
from celluloid import Camera

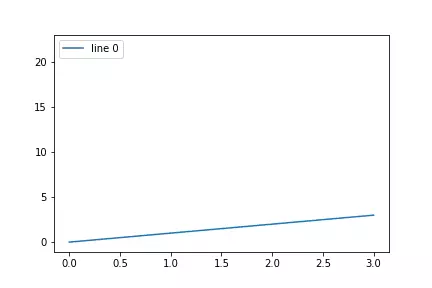
fig = plt.figure()
camera = Camera(fig)
for i in range(20):
t = plt.plot(range(i, i + 5))
plt.legend(t, [f'line {i}'])
camera.snap()
animation = camera.animate()
animation.save('celluloid_legends.gif', writer = 'imagemagick')

通过定时器Timer触发事件,定时更新绘图

这个没开始研究,但是,我确定是我必须要掌握的。

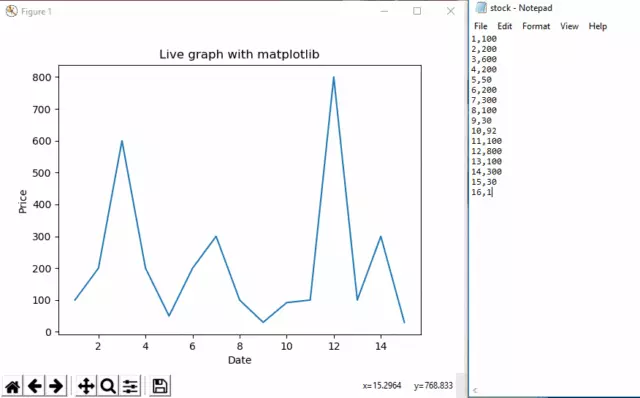
通过定时器Timer触发事件,定时更新绘图,可以形成动态更新图片。下面的实例是学习《matplotlib for python developers》一文的笔记。

实例如下:

通过self.user = self.user[1:] + [temp],每次删除列表的第一元素,在其尾部添加新的元素。这样完成user数据的动态更新。其他详细的解释见文中的注释部分。

1
2
3
4
5
6
7
8
9
10
11
12
13
14
15
16
17
18
19
20
21
22
23
24
25
26
27
28
29
30
31
32
33
34
35
36
37
38
39
40
41
42
43
44
45
46
47
48
49
50
51
52
53
54
55
56
57
58
59
60
61
62
63
64
65
66
67
68
69
70
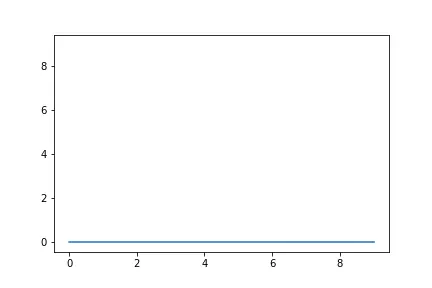
#-*-coding:utf-8-*-
import wx
from matplotlib.figure import Figure
import matplotlib.font_manager as font_manager
import numpy as np
from matplotlib.backends.backend_wxagg import \
FigureCanvasWxAgg as FigureCanvas
# wxWidgets object ID for the timer
TIMER_ID = wx.NewId()
# number of data points
POINTS = 300

class PlotFigure(wx.Frame):
"""Matplotlib wxFrame with animation effect"""
def __init__(self):
wx.Frame.__init__(self, None, wx.ID_ANY, title="CPU Usage Monitor", size=(600, 400))
# Matplotlib Figure
self.fig = Figure((6, 4), 100)
# bind the Figure to the backend specific canvas
self.canvas = FigureCanvas(self, wx.ID_ANY, self.fig)
# add a subplot
self.ax = self.fig.add_subplot(111)
# limit the X and Y axes dimensions
self.ax.set_ylim([0, 100])
self.ax.set_xlim([0, POINTS])

self.ax.set_autoscale_on(False)
self.ax.set_xticks([])
# we want a tick every 10 point on Y (101 is to have 10
self.ax.set_yticks(range(0, 101, 10))
# disable autoscale, since we don't want the Axes to ad
# draw a grid (it will be only for Y)
self.ax.grid(True)
# generates first "empty" plots
self.user = [None] * POINTS
self.l_user,=self.ax.plot(range(POINTS),self.user,label='User %')

# add the legend
self.ax.legend(loc='upper center',
ncol=4,
prop=font_manager.FontProperties(size=10))
# force a draw on the canvas()
# trick to show the grid and the legend
self.canvas.draw()
# save the clean background - everything but the line
# is drawn and saved in the pixel buffer background
self.bg = self.canvas.copy_from_bbox(self.ax.bbox)
# bind events coming from timer with id = TIMER_ID
# to the onTimer callback function
wx.EVT_TIMER(self, TIMER_ID, self.onTimer)

def onTimer(self, evt):
"""callback function for timer events"""
# restore the clean background, saved at the beginning
self.canvas.restore_region(self.bg)
# update the data
temp =np.random.randint(10,80)
self.user = self.user[1:] + [temp]
# update the plot
self.l_user.set_ydata(self.user)
# just draw the "animated" objects
self.ax.draw_artist(self.l_user)# It is used to efficiently update Axes data (axis ticks, labels, etc are not updated)
self.canvas.blit(self.ax.bbox)
if __name__ == '__main__':
app = wx.PySimpleApp()
frame = PlotFigure()
t = wx.Timer(frame, TIMER_ID)
t.Start(50)
frame.Show()
app.MainLoop()

但程序运行在关闭的时候会出现应用程序错误,不知道什么问题。python不是有垃圾回收机制吗,难道是内存泄露?

猜测的原因可能是在关闭的时候正在绘图故导致应用程序出错。通过添加Frame的析构函数,停止更新则不会出现问题。

def __del__( self ):
    t.Stop()
请我喝杯咖啡吧~