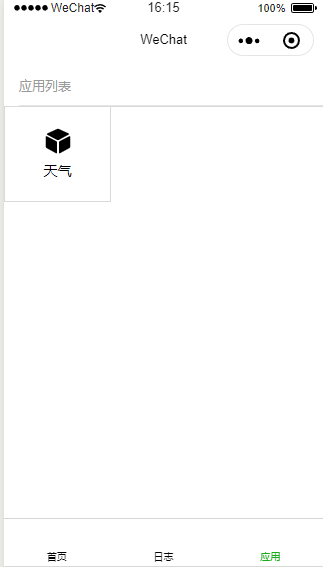
小程序开发——实现个人助手功能清单发布。
Django后台实现
定义功能清单的通用数据字段
功能名字
功能分类(category)
功能的附加信息(版本、地址、描述)
实现功能清单的接口
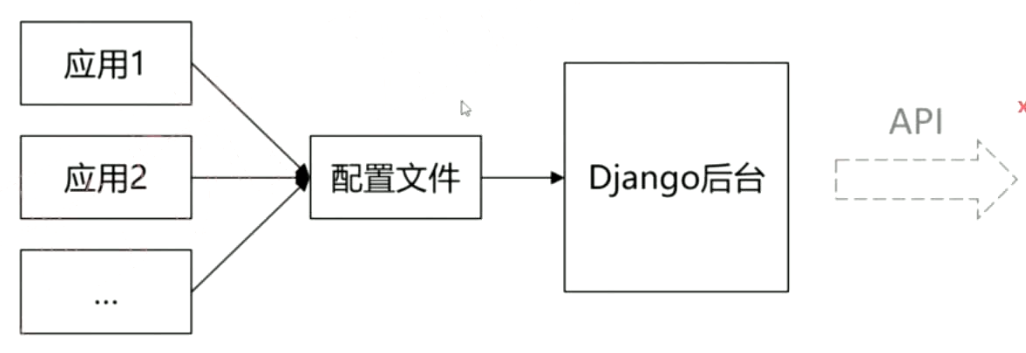
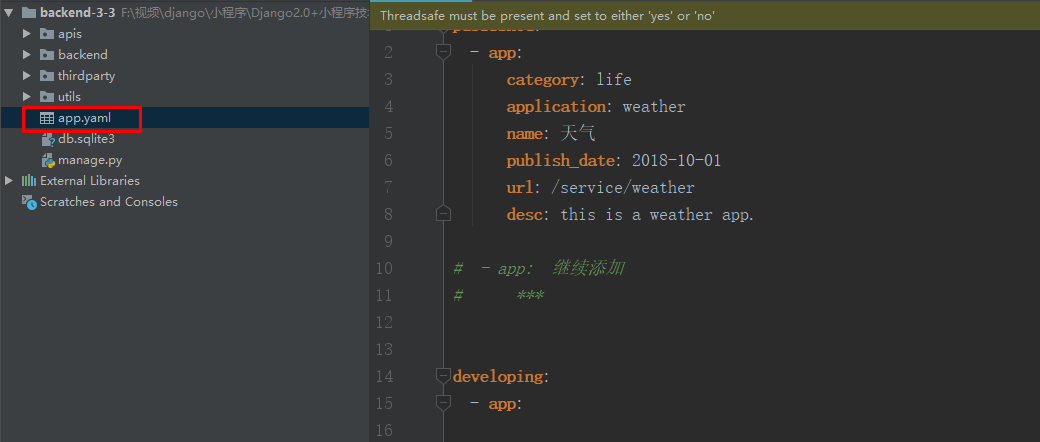
在django的project中,我们定义一个 app.yaml 的文件,用来描述正在开发的app和开发完成的app
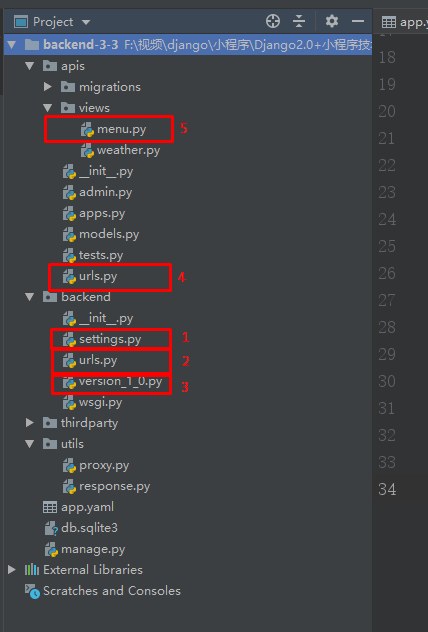
其路由过程如下,先是根据 setting.py 找到根路由
ROOT_URLCONF = 'backend.urls'
然后根据 project 的 urls.py 文件,找到分路由
urlpatterns = [
    path('admin/', admin.site.urls),
    path('api/v1.0/', include('backend.version_1_0'))
]
转到 project 下的 version_1_0.py 路由下
urlpatterns = [
    path('service/', include('apis.urls'))
]
进入进入apis应用内,找到相应应用下的路由文件 urls.py
urlpatterns = [
    # path('', weather.helloworld)
    path('weather', weather.weather),
    path('menu', menu.get_menu)
]
根据上面的那些进入对应得视图文件。
其中 menu.py 下的文件内容为:
1
2
3
4
5
6
7
8
9
10
11
12
13
14
15
16
17
18
19
20
21
22
23
| import os
import yaml
from django.http import JsonResponse
from backend import settings
import utils.response
def init_app_data():
data_file = os.path.join(settings.BASE_DIR, 'app.yaml')
with open(data_file, 'r', encoding='utf-8') as f:
apps = yaml.load(f)
return apps
def get_menu(request):
global_app_data = init_app_data()
published_app_data = global_app_data.get('published')
response = utils.response.wrap_json_response(data=published_app_data,
code=utils.response.ReturnCode.SUCCESS)
return JsonResponse(data=response, safe=False)
|
那个
import utils.response
是自己编写得代码,是为了让返回函数有更好得封装,如下
1
2
3
4
5
6
7
8
9
10
11
12
13
14
15
16
17
18
19
20
21
22
23
24
25
26
27
28
29
30
31
32
33
|
class ReturnCode:
SUCCESS = 0
FAILED = -100
UNAUTHORIZED = -500
BROKEN_AUTHORIZED_DATA = -501
WRONG_PARMAS = -101
@classmethod
def message(cls, code):
if code == cls.SUCCESS:
return 'success'
elif code == cls.FAILED:
return 'failed'
elif code == cls.UNAUTHORIZED:
return 'unauthorized'
elif code == cls.WRONG_PARMAS:
return 'wrong params'
else:
return ''
def wrap_json_response(data=None, code=None, message=None):
response = {}
if not code:
code = ReturnCode.SUCCESS
if not message:
message = ReturnCode.message(code)
if data:
response['data'] = data
response['result_code'] = code
response['message'] = message
return response
|
通过上面部署代码运行后,在 postman 中输入
127.0.0.1:8000/api/v1.0/service/menu
得到
{
    "data": [
        {
            "app": {
                "publish_date": "2018-10-01",
                "category": "life",
                "application": "weather",
                "url": "/service/weather",
                "desc": "this is a weather app.",
                "name": "天气"
            }
        }
    ],
    "result_code": 0,
    "message": "success"
}
小程序的实现
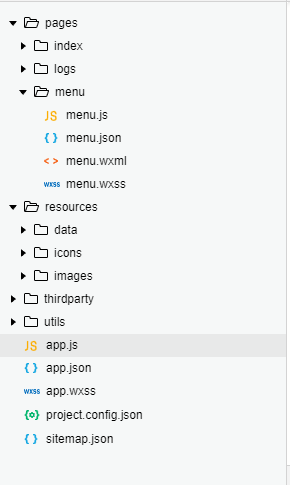
在 app.js 中,我们定义全局属性:
globalData: {
    userInfo: null,
    serverUrl: 'http://127.0.0.1:8000',
    apiVersion: '/api/v1.0'
}
然后,我们进入 menu 文件夹下的 menu.js
1
2
3
4
5
6
7
8
9
10
11
12
13
14
15
16
17
18
19
20
21
22
23
24
25
26
27
28
29
30
31
32
33
34
35
36
37
38
| // pages/menu/menu.js
const app = getApp() //全局唯一的APP对象
Page({
/**
* 页面的初始数据
*/
data: {
grids: [{
"name": "应用1"
}, {
"name": "应用2"
}], // 九宫格内容
},
/**
* 生命周期函数--监听页面加载
*/
onLoad: function(options) {
this.updateMenuData()
},
/**
* 请求后台,更新menu数据
*/
updateMenuData: function() {
var that = this
wx.request({
url: app.globalData.serverUrl + app.globalData.apiVersion + '/service/menu',
success: function(res){
var menuData = res.data.data //这里面的两层data是因为,第一个data是res的,第二个是传过来的data参数
that.setData({ //动态获取
grids: menuData
})
}
})
}
})
|
这里一个细节是 onLoad 的函数内,调用了 updateMenuData 函数。
而 menu.wxml 的内容如下:
1
2
3
4
5
6
7
8
9
10
11
12
13
14
15
16
17
18
| <!--pages/menu/menu.wxml-->
<view class="page">
<view class="page__hd">
<view class="weui-panel__hd">应用列表</view>
</view>
<view class="page__bd">
<view class="weui-grids">
<block wx:for="{{grids}}" wx:key="*this">
<navigator url="" class="weui-grid" hover-class="weui-grid_active" data-index='{{index}}' bindtap='onNavigatorTap'>
<image class="weui-grid__icon" src="../../../resources/icons/cube.svg" />
<!-- <view class="weui-grid__label">{{item.name}}</view> -->
<!-- 如果不是动态数据,应该没有app这个数据的,但是,由于获取动态数据,那么我们加上app -->
<view class="weui-grid__label">{{item.app.name}}</view>
</navigator>
</block>
</view>
</view>
</view>
|
